AccueilTutorials and best practices in the practice

Tutorials and best practices in the practice

3 tools to help you get started with iPhysio® easily and without error:
Clinical videos and a complete e-learning course to learn everything there is to know about iPhysio (advanced use).
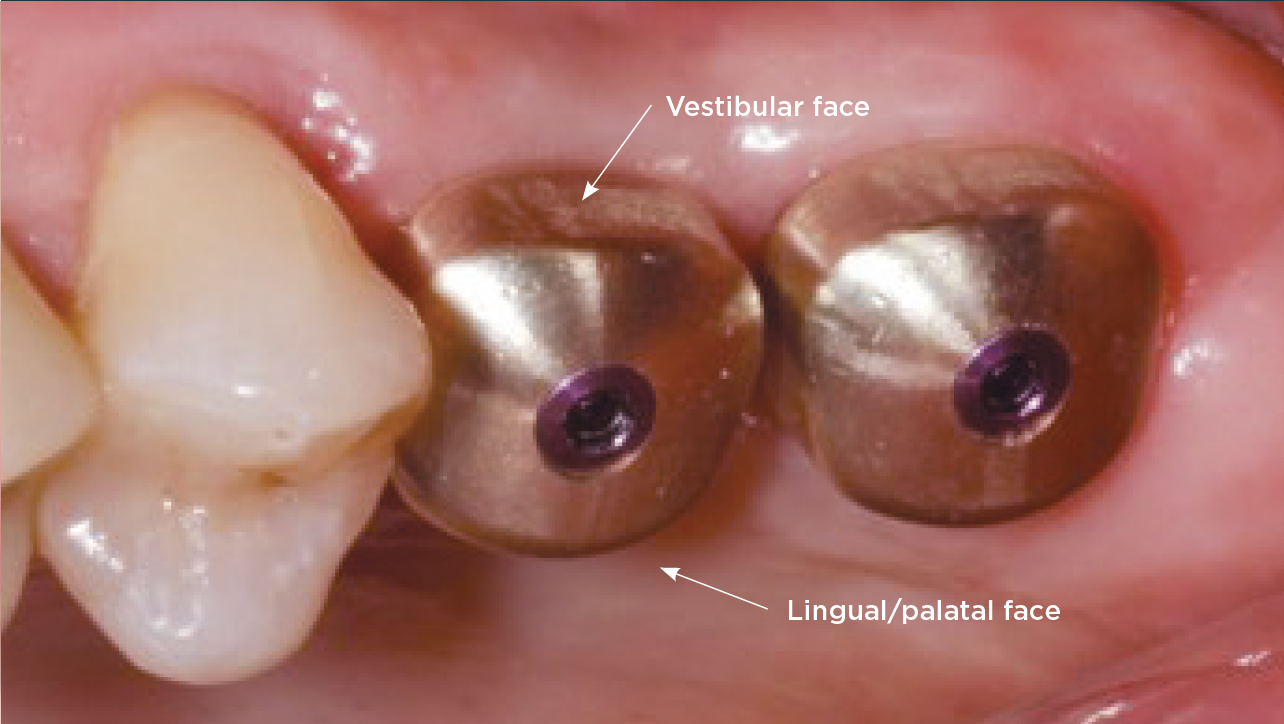
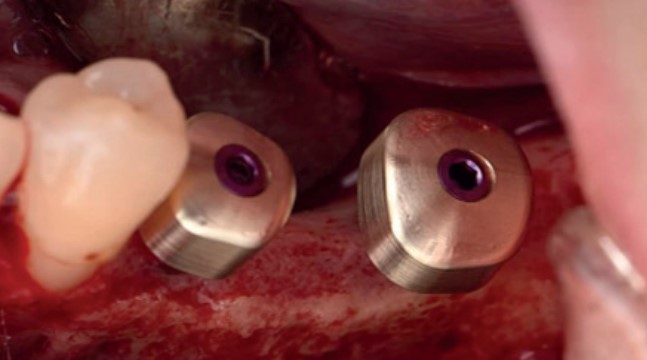
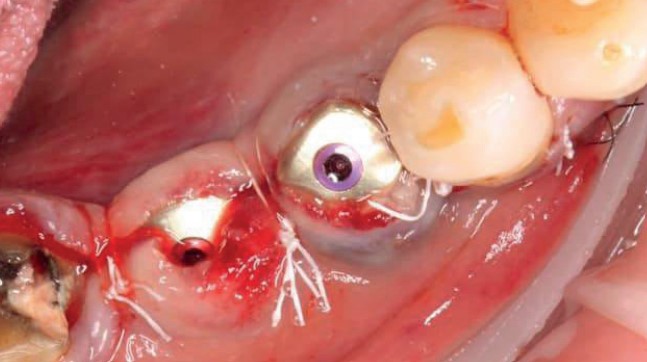
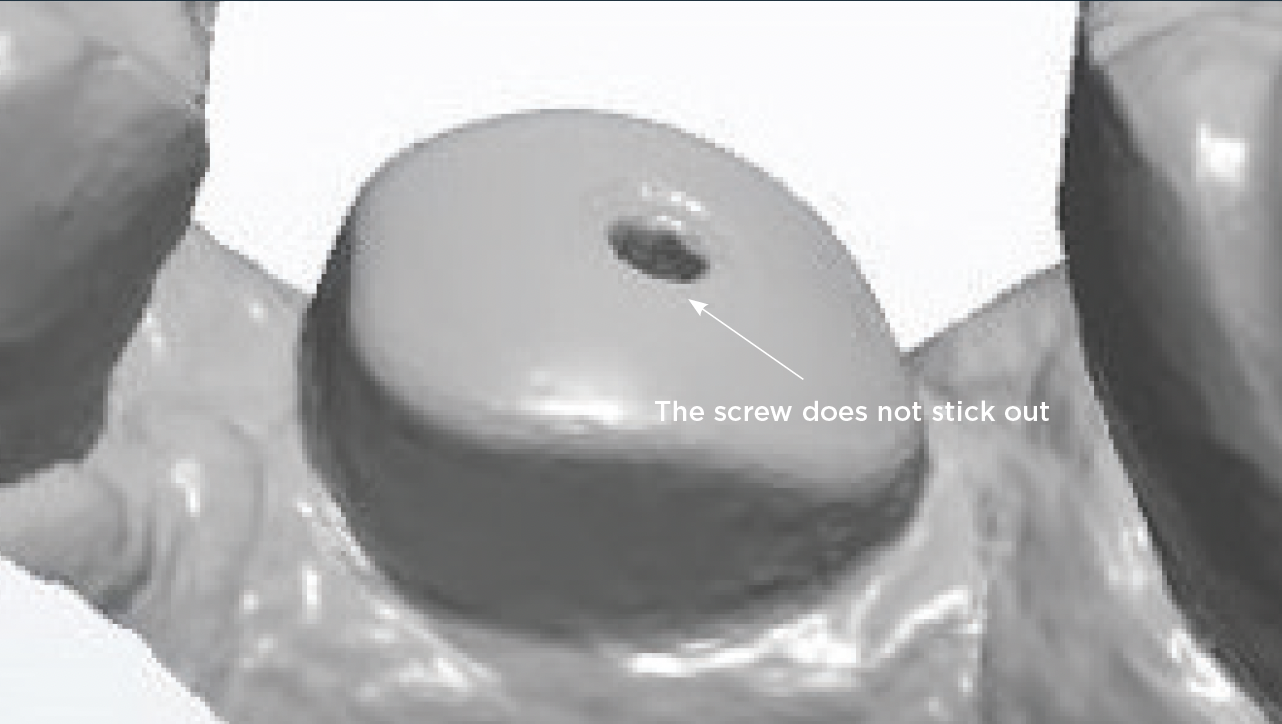
The iPhysio® Code, a clinical illustration of best practices and pitfalls to avoid.
 Tutorials on essential steps.

iPhysio® selection

Choice of anatomical shapes

Using the iPhysio® Try-in abutment kit

Positioning the iPhysio®

iPhysio® orientation

Two adjacent iPhysio®
must be separate

YesNo

For the CT scan to be able to identify
them individually, the iPhysio® must be spaced apart

If they are in contact, the CT scan confuses them into a single part that
cannot be recognized when matching them with the library. This also
creates uncertainty as to their correct fi t in the implant connectivity.

Create a stable prosthetic bed

iphysio créer berceau prothétique anatomique ouiiphysio prothétique anatomique non
YesNo

The vertical positioning of the iPhysio®
Profile Designer determines the prosthetic bed

The concave profile of the iPhysio® Profile Designer increases soft
tissues and creates a seal for greater bone stability. Its convex profile
maintains biological space by supporting the papillae and gingival line.

Preserve the gingival papillae

préserver papille gingivale iphysio non
YesNo

Preserve the gum papillae through the correct 
orientation of the iPhysio®

The iPhysio® has two different sides, one vestibular, the other
lingual/palatal. Positioning correctly the iPhysio® is ideally suited
to the natural anatomy of the teeth.

Successful impression

réussir empreinte iphysio ouiempreinte iphysio non
YesNo

Place at least 1.5 mm above the soft tissues

To ensure the perfect recognition of the iPhysio® by the intra 
oral scanner, it must not be covered by the tissue during 
the impression process.

Securing the prosthetic
adaptation and the occlusion

adaptation prothétique occlusion iphysio
YesNo

A smooth surface is the guarantee
of a properly engaged iPhysio®

To ensure a perfect match between the prosthetic cradle of the
iPhysio® and the final restoration, it is strongly recommended
to systematically tighten the screw before taking an impression and
to check the insertion with a retroalveolar X-ray.

iPhysio® temporary

iPhysio® provisional tutorial

Serve the resin for
your temporary prosthesis

bonne pratique iphysio préserver résine prothèse provisoirerésine provisoire iphysio
YesNo

The temporary abutment allows you to easily remove
the provisional prosthesis when it is once

To preserve the resin of your temporary prosthesis when you are
removing it for adjustments, keep the temporary 
abutment in its entirety.

Impression on iPhysio®

empreinte silicone iphysio

I make my silicone impression in the practice directly on the iPhysio® Profile Designer

I send my silicone impression to the laboratory.

Read more
picto dentiste scanner

I take optical impression in the practice directly on the iPhysio® Profile Designer

I send my impression file to the laboratory.

Read more

Prosthesis avoid 
manipulation of the supra-implant 
parts during adjustment

piece supra implantaire iphysioiphysio dentiste
YesNo

A used and sterilized iphysio designer profile is ideal
for finalizing the prosthesis

Once the provisional prosthesis has been formed, it can be finalised
outside the patient’s mouth on another iPhysio® Profile Designer
that you have sterilised beforehand. This has 2 advantages: you
preserve the soft tissue and you do not wear out the abutment clip
unnecessarily.

Use the screw
to remove the iphysio®

enlever iphysio bonne pratiqueenlever iphysio mauvaise pratique
YesNo

The screw is a good gripper

The iPhysio® has a captive screw. Pull out this screw slightly and
use it as a gripper to make it easier to remove the iPhysio®. Thus,
you preserve the marginal tissues.

Maintain the gingival cradle
in the final restoration

YesNo

Select a titanium interface with the same emergence
profi le as the iPhysio® Profi le Designer used

The corresponding interfaces for each iPhysio® Profile Designer in
each implant system are listed in our libraries. To preserve the soft
tissue and avoid tissue compression, the emergence profile created
during the soft tissue healing is retained in the final restoration.

Maintain the properties
of the zirconia coating

revetement zircone bonne pratiquerevetement zircone mauvaise pratique
YesNo

The zirconia coating is valuable

Single use allows the full benefi t of the iphysio zirconia coating, which is
optimal for the soft tissue interface.
Studies show that the surface, despite its zirconia coating, deteriorates
during the cleaning and sterilisation protocol.
Guide to iPhysio® compatibility

Make a HD photo to transmit
the right information

information iphysioiphysio information mauvaise pratique
YesNo

HD photo, an indispensable complement to your scan

The transmission of the correct dimensional information from
iPhysio® is essential. An HD photo makes it possible to confi rm
the colour of the screw and thus avoid any problem of malocclusion
in the fi nal prosthesis. In this case, the screw is yellow.

Communicate well
with your laboratory

iphysio bonne communication laboratoireiphysio communication laboratoire
YesNo

A simple comment on the order form ensures that
the prosthesis is correctly produced

The correct dimensions of the iPhysio® must be provided. In
the ”Comments“ box, indicate the type of iPhysio® and the exact
reference to avoid any confusion.
envelopesmartphone
linkedin facebook pinterest youtube rss twitter instagram facebook-blank rss-blank linkedin-blank pinterest youtube twitter instagram